Author: custom-wp-admin

  • A Simple Guide to Choosing Replacement Windows

    A Simple Guide to Choosing Replacement Windows

    A simple guide to choosing replacement windows

    You knew this day was coming, and here it is; it’s time to replace the windows in your home. If you are anything like I was, you want to get it done cheaply and never think about it again. When I replaced the windows in the first home I bought, it was an expense I didn’t have the money or the time for. I also put little thought into the process other than how much I would have to scrounge together to pay for them. Fast forward 20+ years, and I am in the exterior remodeling industry. I look back on that choice, knowing I missed an opportunity to make that tiny home my own. With unlimited window styles, colors, and materials available, replacing your old windows with modern replacements can dramatically affect your home’s curb appeal. 

    While they are often overlooked, your windows are one of the most important systems in your home. They let in light, lowering your need for electricity, and can provide incredible views from the comfort of your living room. Being from Colorado, the protection they provide from the outside elements is a crucial factor to consider when replacing windows. Old and damaged windows can also be drafty, a safety hazard, and contribute to higher heating and cooling costs.  As your windows age, just like every system, they lose some of their function. In addition to that, new technology makes modern windows an energy efficient option! If you are considering replacing your windows, you might have questions regarding costs, energy efficiency, style options, and more. So, let’s learn what it takes to choose the right replacement windows for your home. We are here to cover: 

    How much does window replacement cost?

    It is common for the first question we get when meeting with a customer about replacement windows to be: How much will they cost? It would be great if there were a straightforward way to answer this question without more information. However, that isn’t the case. Window prices vary based on the window size, the material used, additional security features, specialty glass and glazings, and more.  The average price you can expect to pay typically falls between $700 and $2000 per window but can be higher for larger, high-end installations. This cost is not set in stone and can fluctuate. It’s safe to assume that small, standard-sized windows will be substantially less expensive than larger, customized options. 

    Factors influencing window replacement costs

    Where can I get an accurate Idea of my replacement costs?

    To get an accurate estimate for your window replacement project, it’s essential to contact reputable window replacement contractors in your area. Look for a window company with a skilled and knowledgeable team. They should be able to identify the specific needs of your property, meet your energy-efficiency goals, and provide you with a clear and detailed estimate of the replacement cost. 

    While cost is an important factor, it’s also crucial to consider the long-term benefits of energy-efficient windows. They can lower your energy bills, increase the comfort of your home, and boost its resale value. So, when considering a window replacement, it’s a balancing act between keeping your short-term costs as low as possible and considering the long-term benefits of more customized windows.

    Northern Colorado window replacement by Custom Exteriors, a local window replacement company
    Basement window replacement by Custom Exteriors

    Repair or replace: what’s the right choice for you?

    Considering the cost of replacing windows, choosing between repair and replacement is a valid question when you start having issues with your current windows. After all, if your current windows are functioning properly and newer than ten years old, a repair could save thousands over a replacement. However, a window “repair” that is not successful can lead to much larger problems, including water damage and mold growth. The decision hinges on several factors, and understanding them can help you make an informed choice. Things to consider when deciding between window replacement and window repairs:

    1. Window Age:

    Consider how old your existing windows are. Repairs might be sufficient if they’re relatively new and the issues are minor. On the other hand, if your windows are reaching or surpassing their expected lifespan (typically 20-25 years), it might be time for a complete replacement. 

    2. Extent of damage:

    Assess the extent of the damage to your windows. Small issues like a broken latch or minor air leak can often be repaired effectively and within a reasonable budget. However, replacement is likely the more practical choice if the damage is extensive, such as rot, warping, or multiple broken panes. 

    3. Impact on Curb appeal:

    Windows often play a significant part in your home’s appearance. With this in mind, it’s essential to consider their impact on your home’s curb appeal. Repairs may only partially restore the original look, especially if you’re dealing with extensive damage or mismatched materials. In such cases, a replacement can provide a fresh, cohesive appearance. 

    4. Energy efficiency:

    Older windows are rarely as energy-efficient as modern ones. Look at your windows if you notice drafts, condensation between the panes, or increased energy bills. Those may be signs that your windows are no longer doing an excellent job of insulating your home. Replacing them with energy-efficient options can lead to long-term savings and improved comfort. 

    5. Long-term investment & Cost comparison

    Consider your long-term plans for your home. If you plan to stay in your current residence for many years, investing in high-quality replacement windows can be wise. They offer better insulation, durability, and energy savings, making your home more comfortable and potentially increasing its resale value. While repairs can be more affordable upfront, weighing this against the long-term benefits of replacement is essential. New, energy-efficient windows may lead to substantial savings on heating and cooling costs over time. 

    Consulting a professional:

    When in doubt, consulting with a window replacement professional is always a good idea. They can assess the condition of your windows, discuss your goals and budget, and provide expert guidance on whether repair or replacement is the best choice for your specific situation. The decision to repair or replace your windows depends on factors such as their age, the extent of damage, energy efficiency, curb appeal, long-term plans, and cost-considerations. By carefully evaluating these factors and seeking professional advice when needed, you can make a well-informed decision that ensures your home’s comfort, appearance, and efficiency. 

    Pro Tip

    If you have experienced hail damage, a broken window frame typically results in coverage for a window replacement

    Did you know that a chipped or broken window frame is typically covered under a hail damage claim, depending on coverage? After a hail storm, check the frames of your windows for damage. Your exterior contractor should be able to walk you through the insurance process and ensure you are receiving coverage for all of the damage incurred. 

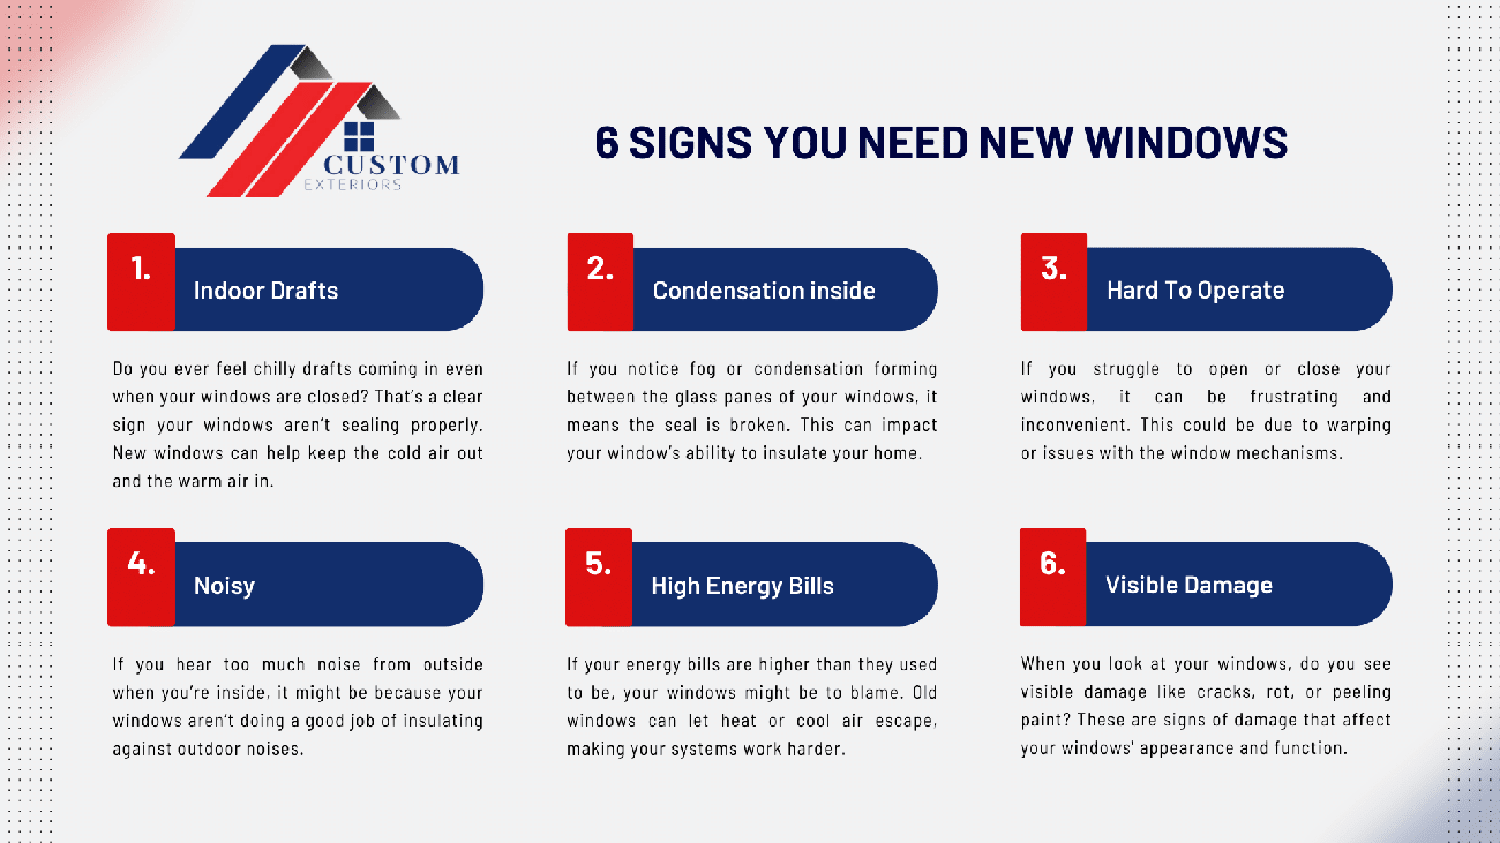
    Signs your windows need replacement: Is it time for new windows?

    As windows age, they start showing signs that it is time for an upgrade. Here are some easy-to-spot signs that suggest your windows might need replacing: 

    If you see any of these signs, you have options. Replacing your windows can improve your home’s comfort, energy efficiency, and appearance. It’s an investment in making your home a better place to live. 

    Infographic designed to explain 6 signs you need new windows

    What to look for in replacement windows: Making the right choice

    When getting new windows for your home, what should you factor into your decisions? Some critical things to consider include: 

    When replacing your windows, your first consideration should be their role in keeping your house comfortable. A great way to find energy-efficient windows is to look for an ENERGY STAR label. These windows can help you save money on heating and cooling bills because they keep your home warmer in the winter and cooler in the summer.  

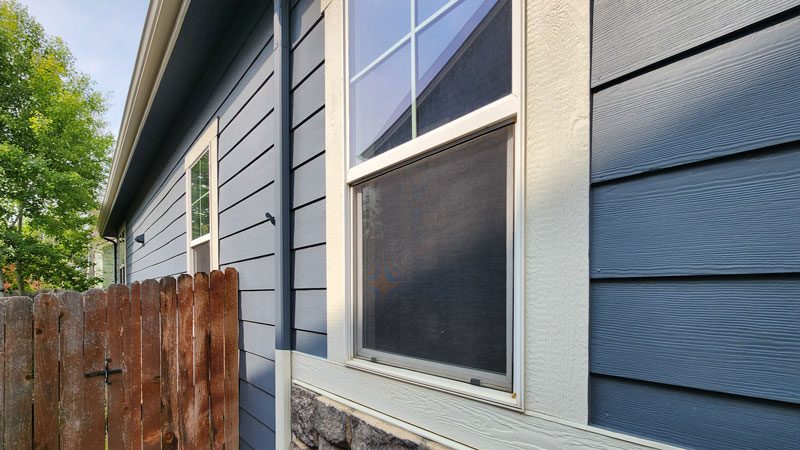
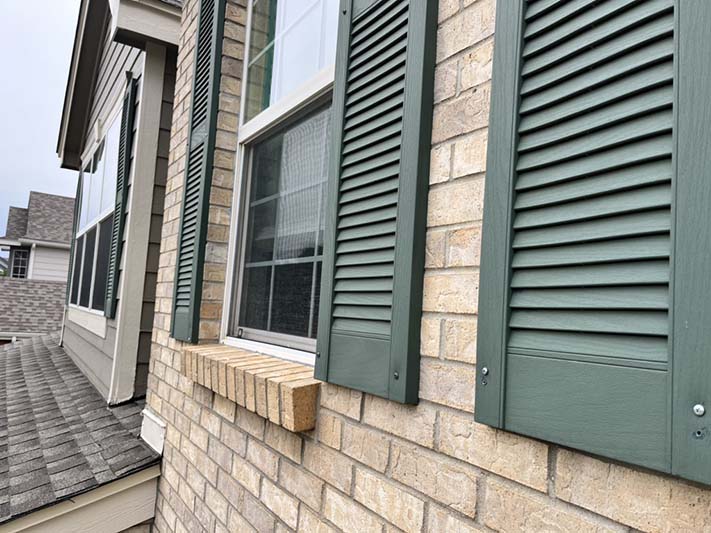
    Replacement windows also come in many different styles and materials. The choice of which window style works best allows your new windows to match the architectural style of your house while still benefiting from the increased energy efficiency new windows provide. When designing the perfect replacement window, windows with Low-E glass can be a great choice. They help keep the sun’s heat and harmful UV rays out while letting in natural light. Plus, they protect your furniture and floors from fading. 

    Another factor to consider when replacing your windows is your budget. Think about how much you want to spend while keeping in mind that some additional features may end up resulting in greater long-term savings. You should also consider how much time and effort you will put into taking care of your windows. Some materials, like vinyl, need very little maintenance, while wood windows require much more dedication to keep them in good shape. 

    Finding the best window replacement contractor: Who can you trust?

    When it’s time to replace your windows, choosing the right contractor is one of your most important decisions. Here’s a breakdown of how to find the best window replacement contractor: 

    1. Ask for recommendations and check Reviews & references:

    Start by asking friends, family, and neighbors if their windows were replaced and whether they were satisfied with the contractor’s work. Personal recommendations can be a reliable way to find trustworthy professionals. Also, look for online reviews and ratings of window replacement contractors in your area. Websites like Google, Yelp, or the BBB can provide valuable insights into other customers’ experiences. Take note of their policies on customer services, warranties, and deadlines. 

    2. Verify Licenses & Insurance:

    Ensure that any contractor you consider is licensed to work in your area. Licensing requirements vary by location, but a licensed contractor often means they meet specific standards. This is also a great time to ensure they have proper insurance to protect you and their workers in case of accidents.  

    3. Get Detailed Estimates & Ask Questions:

    Ask your window contractor for a detailed estimate. Ensure it includes labor and material prices, lays out a timeline for your project, provides warranty terms, and is specific regarding material brands being installed. Also, don’t be afraid to ask potential window contractors questions. Inquire about their experience with window replacement, the types of windows they recommend, and the warranty they offer. A reputable contractor should be happy to answer your questions. 

    4. Trust your instincts:

    Pay attention to how well the contractor communicates with you. Do they return your calls or emails promptly? Good communication is critical to a successful project. Finally, trust your instincts. If something doesn’t feel right with a contractor, it may be best to look elsewhere. You should feel comfortable and confident in your choice. 

    Remember, It’s your home:

    Replacing your windows isn’t something most people look forward to; however, it’s an important step to take in the long-term protection of your home. Take your time to find a contractor you trust and feel comfortable working with. Don’t rush the decision, and prioritize quality over the lowest price. Doing so will increase the chances of a successful window replacement project that enhances your home’s comfort and value. 

    Things to consider when choosing replacement windows:
    Making the right choice

    If I were choosing those replacement windows again, my budget would still likely be my first consideration. However, I would also consider my needs in the following areas:

    Budget, Maintenance, and Climate: Key Considerations for Replacement windows

    While it is sometimes tempting to choose the cheapest option, remember that investing more in high-quality windows can save you money in the long run. Consider how much time you have to take care of your windows. Some materials, like vinyl, need very little maintenance. However, while beautiful, wood windows will require much more maintenance to keep them in good condition. This is important to understand before choosing your replacement windows, helping you make informed decisions about your home. 

    Another essential factor to consider is your local climate. Think about the weather where you live. If you are in a place with hot summers or cold winters, you’ll want to choose windows that can handle those conditions. Your windows should keep you comfortable no matter the weather outside. By selecting high-quality windows that can handle your local climate, you can extend the lifespan of your replacement windows.  

    Selecting windows: Style, materials, and energy Efficiency

    Once you have evaluated your needs, it’s time to think about the look you want for your home. Windows come in different styles, like double-hung, casement, sliding, or picture windows. Choose a style that fits your home’s design and your tastes. This brings you to the selection of your window materials. Common materials include vinyl, wood, and fiberglass. Your material choice will impact everything from your long-term maintenance to your budget. 

    Lastly, consider how well your new windows can keep your home comfortable. Look for windows with good insulation. The ENERGY STAR label indicates that those windows will help save money on heating and cooling costs. Their increased insulation ability helps keep your home warmer in the winter and cooler in the summer. An additional benefit of energy-efficient windows is the tax breaks sometimes associated with replacement. We advise our customers to look into it when replacing your windows. 

    Insider Tips for selecting replacement windows

    If you are choosing replacement windows now, while lesser-known, there are other areas that should be researched before replacing your windows. Some things to include in your research are: 

    If you are selecting your new windows, one of these factors could make the difference between your satisfaction with your replacements. Make sure this significant investment is worth your time and is an investment in your home’s value and daily comfort. You can enjoy a safer, quieter, and more energy-efficient living space with the right choices. Take time and carefully consider your wants and needs during this critical decision. 

  • Choosing The Right Exterior Paint: A Comprehensive Guide For Homeowners

    Choosing The Right Exterior Paint: A Comprehensive Guide For Homeowners

    Choosing the right Exterior paint:
    A comprehensive guide

    Painting the exterior of your home is no small feat. It’s a significant investment, both in time and resources. As such, selecting the right type of paint is essential, ensuring that your home looks stunning and remains protected against the elements.

    Moreover, the paint you choose is the first line of defense against nature’s unpredictable weather – from scorching sun rays to icy cold snaps. A properly painted home can resist weather damage, mold growth, and even insect infestations. But the question remains: amidst the plethora of brands, finishes, and shades, how do you pinpoint the perfect paint for your needs? It is more than just picking a color you like. It’s also about understanding what works best for the material of your home, your climate, and the desired longevity of your new paint job. 

    You are not alone if you’re feeling lost amidst the vast array of paint choices. This guide aims to simplify the process, providing you with the knowledge and tips you need to make informed decisions about your exterior remodel. You can then be confident that you have made the best decision for your home. 

    Understanding the basics: Types of exterior paints

    When repainting your home’s exterior, the first decision often revolves around the base of the paint. Essentially, paint falls into two primary categories: water-based, commonly referred to as latex, and oil-based, known as alkyd. 

    Water-Based paint: Understanding Latex Paints

    Water-based or latex paints have become increasingly popular in recent years. One of their standout qualities is the quick drying time, which allows for fast project completion. This rapid drying is especially beneficial if you’re painting in regions with unpredictable weather, as it reduces the chances of the paint being affected by sudden rain showers. Another advantage of latex paints is their easy clean-up process using just soap and water. Compared to their oil-based counterparts, they have a lower odor, making them a popular choice for many homeowners. However, while latex paint excels in many areas, it struggles to adhere to surfaces previously painted with oil-based paint. 

    Oil-Based or Alkyd paints

    On the other hand, oil-based or alkyd paints bring a different set of advantages to the table. Their application is often smoother, resulting in a more uniform finish. The result often boasts a durable, glossy finish that stands the test of time. This durability is why many professionals and homeowners opt for oil-based paints for areas exposed to significant wear and tear. Furthermore, oil-based paints adhere well to various surfaces, ensuring a long-lasting paint job. However, they are not without their challenges. The drying time for oil-based paints is considerably longer, which might stretch the duration of your painting project. Clean-up is also more involved, requiring mineral spirits instead of the simple soap and water solution that latex paints allow. Additionally, the pungent odor they produce might be off-putting to some people. 

    infographic about the pros and cons of oil based paint

    Both latex and alkyd paints have their benefits and disadvantages. Your choice between the two should factor in your home’s specific needs, the region’s climate, and your personal preferences, especially concerning drying time and odor. 

    The importance of Finish: making the right choice

    When we talk about painting our homes, color is often the first thing that comes to mind. However, the finish and sheen of the paint are equally important. This aspect determines how the paint reflects light, affecting its appearance and how it stands up to daily wear and tear. Each finish has different properties, catering to different needs and styles. The sheens available in paint are:

    Infographic explaining the qualities of the 5 main paint sheens, flat, eggshell, satin, semi-gloss, and glossy

    Flat/Matte: The timeless classic

    A flat or matte finish is known for its non-reflective properties. This means it doesn’t bounce back much light. Because of this, flat pain has a very muted and soft appearance. A matte finish might be the best choice if your home is older with a story to tell with its imperfections. This is because it is excellent at masking minor blemishes or irregularities on the surface. However, while it’s great at hiding those little flaws, it’s also more susceptible to stains and might require careful cleaning. 

    Eggshell: The middle ground

    Venturing into a slight sheen, we have the eggshell finish. As the name suggests, it’s reminiscent of the subtle shine on an egg’s shell. This finish is a step up from flat in terms of washability. It strikes a balance, offering some of the concealing properties of matte paints while being easier to clean. So, eggshell could be a great candidate if you’re thinking about painting larger areas like siding. 

    Satin: The reliable choice

    Satin is a favorite among many homeowners. This finish provides a gentle gloss, which makes surfaces appear more vibrant while not being overly shiny. Its appeal doesn’t stop at aesthetics; satin finishes are known for their durability and ease of maintenance. They are forgiving with cleaning, making them a practical choice for exteriors that are exposed to regular environmental elements. 

    Semi-Gloss: The Bright spark

    Stepping into a more reflective territory, the semi-gloss finish is all about vibrancy. It reflects light more efficiently, making surfaces stand out. If you have specific architectural features or areas like doors and trim that you’d like to highlight, semi-gloss is a good choice. Its bright nature not only amplifies beauty but also offers excellent durability. 

    Glossy: The Bold Statement

    The glossy finish is the way to go for those unafraid of making a bold statement. It’s the most reflective of the bunch, providing a shiny, mirror-like appearance. Its high sheen is accompanied by impressive durability. However, with great shine comes great responsibility. A glossy finish accentuates imperfections, making preparation even more critical. 

    Choosing the right finish for your home is about understanding its characteristics and aligning them with your home’s needs and desired aesthetic. Then, with this knowledge in hand, you are well-equipped to make informed decisions. These choices will beautify your home and ensure it remains charming for years to come. 

    Insider tips for the best paint selection

    A beautiful paint job

    1. The foundation of painting: Surface preparation

    Before diving right in, it’s essential to address the surface that will be painted. A clean, smooth surface can make a world of difference. If there are cracks, fill them in. If there’s old, peeling paint, give the surface a good scrape. And always remember to clean the walls from dust and dirt. 

    2. Tune into yor home’s needs

    Every home is unique, and so are its needs. For instance, a house in a dun-drenched area might benefit from paint with UV protection. Similarly, homes in wetter climates might need paint with mold resistance. By understanding your home’s specific challenges, you can choose paint that beautifies and protects. 

    3. The magic of test patches

    It’s tempting to pick a color from a swatch and imagine it’ll look exactly the same on a large exterior wall. But, light shadows and surrounding elements can change how a color appears. So, a smart trick is to paint a small test patch on the wall. You can then observe it during different times of the day. This way, you ensure the color looks great under all conditions before committing and painting your entire exterior that color. 

    4. Quality over Quantity

    It might be tempting to save a few dollars by opting for cheaper paint, but this might cost more in the long run. Higher-quality paints often mean better coverage, longevity, and resistance to the elements. It’s an investment in ensuring your home looks fabulous for extended periods. 

    5. Seek expert advice

    Lastly, don’t underestimate the value of professional advice. Local paint stores or a local painting company often have experts who understand the unique challenges of your region. They can provide invaluable recommendations tailored to your specific needs. 

    Wrapping it up: A painter’s parting words

    In the world of painting, knowledge truly is power. The proper preparation, paired with a good understanding of your home’s needs, paves the way for a paint job that is not only beautiful but stands the test of time. Remember, it’s not just about color but about making choices that add value, protection, and beauty to your home. With the insights provided, your home’s next coat of paint is sure to be its best yet. 

  • Siding 101: Materials, Maintenance, and More

    Siding 101: Materials, Maintenance, and More

    Siding 101: Materials, Maintenance, and more

    The exterior of a house, like the clothes we wear, makes a significant first impression. One of the key components of your home’s exterior is the siding. It not only beautifies but also protects your home from the harsh elements. So, in this guide, we’ll look deep into the world of siding: the materials you can choose from, how to maintain them, and even the transformative impact they can have on your home. 

    The significance of siding can’t be overstated. Firstly, it serves as a protective shield, warding off the severe weather our area is known for and other natural pests such as insects, birds, or rodents. Secondly, well-installed siding can be a game changer for your property’s curb appeal. Depending on your preferences, the right siding can make a house the centerpiece of a neighborhood or allow it to blend seamlessly with its surroundings. Lastly, certain types of siding can be an excellent insulator. Quality siding can help regulate the indoor temperature of your home. It helps keep your house warm in the winter months and cool in the summer. In doing so, new siding can reduce your energy bills and increase your home’s energy efficiency. 

    Siding materials

    When it comes to material selection, there are many customizable choices. Vinyl siding, for instance, is a popular choice because of its affordability, versatility, and low maintenance needs. It boasts longevity without the necessity of frequent painting and is available in many colors and styles. However, it does have its vulnerabilities. These include possibly cracking under extreme temperatures and fading over extended periods. 

    Wood siding, on the other hand, offers a classic, timeless look. Its eco-friendliness and potential for a long lifespan with the proper care make it a popular choice. But, it demands consistent maintenance, from painting to staining, and can be an inviting home for insects or even rot. An engineered wood siding, like LP SmartSide®, while not as durable as fiber cement siding, offers the look of natural wood without some of the maintenance drawbacks of real wood. 

    Lastly, fiber cement siding, a modern favorite, skillfully replicates the appearance of wood while eliminating the associated maintenance challenges. It also stands strong against threats like insects and fire. However, its initial installation and material costs might be higher than some other options, and it is prone to cracking over time. 

    Infographic comparing vinyl, wood, James Hardie, and LP Smartside

    choosing the right material

    There’s a whole world of materials out there, each with its unique set of benefits. Here’s a simple breakdown:

    Choosing the right siding for a replacement and the right siding installer is an important decision. It needs to resonate with your style, provide protection, and stand the test of time. So, whether it’s the versatility of vinyl, the timeless appeal of wood, the smart blend of LP SmartSide®, or the modern sophistication of James Hardie®, each option has unique strengths. By understanding these, homeowners can make a well-informed decision, ensuring their home not only looks stunning but is also protected for years to come. 

    Essential Siding Maintenance practice

    Siding requires maintenance no matter which material you choose

    Regardless of the material chosen, regular maintenance remains one of the most important factors in long-lasting siding. A simple routine of cleaning with a soft brush or low-pressure washer can keep most siding looking pristine. It’s also important to periodically inspect for any signs of damage. We recommend a bi-annual inspection and additional inspections following any extreme weather events. By being diligent about this, you can prevent small maintenance items from becoming much larger and much more expensive issues like interior water damage, mold, mildew, or pest infestations. Moreover, certain sidings, like wood, would benefit from repainting or resealing occasionally to safeguard against the elements and pests.

    Maintenance tips for long-lasting siding

    Transform your home with new siding

    The transformative potential of replacing your home’s siding is enormous. Factors like color choice, texture profile, and combining different siding profiles are key in improving your home’s curb appeal. For example, shake siding is often used in the peaks of homes and painted as an accent color. This is done to add visual interest to your home and can even become a focal point. 

    There are many ways to customize your new siding installation

    The lasting impact of the right choice

    In conclusion, siding plays many roles in the performance of our home. Replacement siding can bring protection, energy-efficiency, and improved curb appeal into one exterior project. When completed by a skilled siding replacement contractor, it can be a game changer.  An understanding of the available materials and the maintenance required to ensure their long life, is important for choosing the right material for your long term needs and your personal style. After all, beyond its appearance, its about choosing a siding replacement that remains resilient through time and diverse weather conditions. In doing so, you guarantee that your home remains beautiful and functional for years to come. 

  • What Is An Ice Dam?

    What Is An Ice Dam?

    What is an Ice dam infographic made by Custom Exteriors

    Understanding ice dams on roofs:
    What they are and how to prevent them

    As a seasoned roofing contractor based in Colorado, we have inspected, replaced, and repaired countless roofs, identifying a wide array of issues. However, one frequent and often misunderstood culprit behind a leaky roof is not what you’d typically suspect—it’s ice dams, often caused by poorly maintained and clogged gutters or inadequate roof venting. 

    In Colorado, ice dams are a common wintertime roofing issue. Picture a cold winter day, your property cozily heated from inside. As the warmth of the interior rises, it meets the cold underside of the roof. The melting snow from the warmer parts of your roof flows down and refreezes at the colder edge, particularly if your gutters are clogged and not allowing for proper drainage. This cycle creates an actual dam of ice, further preventing proper drainage and potentially causing water to back up under your shingles and into your home. 

    Understanding what an ice dam is and recognizing the role of gutter system maintenance is crucial in preventing it. Factors that play a role in ice dams forming are:

    What is an Ice Dam? A closer Look

    An ice dam, quite simply, is a ridge of ice that forms at the edge of a roof. When the snow on your roof melts due to heat escaping from your home or from the sun’s rays, water trickles down towards the edge. Now, the house’s eaves (the part of the roof that overhangs at the bottom) are usually colder because they’re beyond your home’s insulation. So, when that melted snow reaches the colder eaves, it refreezes, creating this ridge or “dam” of ice. 

    Why is this a problem? As more snow melts and trickles down, it hits this dam and has nowhere to go. Instead of harmlessly dripping off your roof or flowing into the gutters, the ice dam traps the water. Over time, this backed-up water can seep under the roof shingles. This can potentially lead to leaks inside your house. Ice dams can cause damage without making their presence overly noticeable. 

    Image created by Custom Exteriors to explain how ice dams work

    So, while those hanging icicles might look pretty, they can sometimes signify a more significant issue. Ice dams can be the culprit behind water damage in many homes during the winter months. The first step in tackling this winter challenge is being informed about what they are and how they form. 

    What causes ice dams?

    In the heart of winter, when icicles elegantly drape from the edge of your gutter, an unexpected process can take place on your roof. Ice damming. But what are the root causes of ice dams? 

    Firstly, consider the warmth of your home during the cold months. This heat tends to rise, meeting the underside of the roof. When it does, it can prompt the snow directly above to melt, even if the outside temperature seems bitterly cold. 

    Interestingly, the temperature is not uniform across the entirety of your roof. The higher sections, mainly those closer to the peak, are generally warmer due to the upward-moving heat from the house’s interiors. On the flip side, the roof’s eaves or overhanging parts are often colder. They stretch beyond the home’s main structure and are not influenced by indoor heating. So, as the melted snow from the warmer parts travels down the roof’s slope, it encounters the colder eaves. Here, it refreezes, layer by layer, leading to the ice dam’s creation. 

    This same effect can be caused when your gutter system is clogged and does not allow for adequate water drainage. Without a way to drain away from your property, this melted snow will refreeze in place, creating an ice dam at the edge of your roof. This causes the formation of ice dams, which can easily be prevented with some routine exterior maintenance

    Lastly, ice dams can also form due to inadequate insulation and venting in your attic space. These can cause more heat to escape the roof, increasing the snow melt. As this melt reaches the cooler section of the roof, it can refreeze, causing an ice dam to build. 

    Infographic explaining what causes ice dams on your roof

    Do Ice dams cause damage?

    When you think of a dam, you might imagine it holding back a large body of water. Similarly, an ice dam holds back melting snow. But unlike the dams we are familiar with, roofs are not designed to hold water. As the ice dam grows, it creates a pool of water behind it. This standing water is the first point of concern. As mentioned, roofs are designed to shed water, not let it stand. The longer water remains pooled, the more time it has to find a way inside. It can start to seep under shingles, trickle down the roof decking, and, ultimately, penetrate the home’s interior. This can lead to a series of issues:

    Understanding the potential damage ice dams can cause is the first step toward proactive prevention. Recognizing the potential damage and costly repairs that can be caused by ice dams allows homeowners to take preventative action. In doing so, they are ensuring their homes remain safe and damage-free during the icy grips of winter. 

    Preventing ice dams: pro tips for a damage-free winter

    You now know the hidden hazards of ice dams, so naturally, the next question is: how can you prevent them? Prevention is always better (and usually cheaper) than the cure, especially regarding home maintenance. So, let’s jump into some expert-backed strategies to prevent ice dams from damaging your home. Keys to controlling ice dams include: 

    Preventative measures to prevent ice dams

    It’s important to remember that one of the main issues that cause ice dams is the heat escaping from your home and melting the snow on your roof. By boosting the insulation in your attic, you can ensure the heat stays where it belongs – inside your home and not warming the roof. Ideally, aim for an insulation value (or R-value) that’s recommended for your specific region. Energy Star breaks down recommended R-values for areas throughout the United States. 

    Another consideration is to improve your attic ventilation. A well-ventilated attic helps maintain a cooler roof. In doing so, it reduces the chances of snow melting and refreezing. A great option to increase ventilation is to consider adding ridge and soffit vents. These will create a natural flow of cold air, keeping the entire roof at a consistent temperature. A reputable roofing contractor can properly calculate the appropriate number of roof vents your system needs. 

    Lastly, property owners have seen success in preventing ice dams by installing heat cables along the eaves of their homes. Consider installing heat cables in a zigzag pattern on your roof and in your gutters for particularly troublesome areas. When activated, they create channels for the melted snow to flow off the roof, preventing the formation of ice dams. We find this strategy to be particularly beneficial in areas like the Colorado mountains, where there is the potential for heavy snowfalls and outside temperatures that prevent the snow from quickly melting. 

    Maintenance measures that help prevent ice dams

    After a heavy snowfall, consider using a roof rake with a long handle to clear the snow off the edges of your roof. This reduces the amount of snow available to allow ice dams to form. However, remember always to exercise caution and safety when doing this. Heavy snow and heights may make this project out of reach for some due to physical limitations. 

    Another area that can help prevent ice dams is sealing air leaks in your home. Little gaps and cracks in your home might seem harmless, but they allow warm air to escape, contributing to the snow melting on your roof. So, check around electrical cables, exhaust vents, and places where walls meet the ceiling. Sealing these gaps can be a game changer. 

    Additionally, it is essential to ensure your gutters are free of leaves, twigs, and other debris. Clear gutters help melted snow flow off your roof efficiently and prevent it from refreezing. Gutters should be cleaned in the shoulder seasons before the harshest weather months. 

    Lastly, whether it is due to physical or time limitations, sometimes it’s just best to consult a professional roofer. If you’ve had recurrent issues with ice dams, are uncertain about your home’s preparedness, or cannot complete the tasks above, consider getting a home energy audit. Professionals can provide tailored advice and solutions specific to your home’s needs. 

    avoid Winter challenges to your roof

    Winter, with snowfall and cozy moments, can be a magical season. But as with all things, it comes with its own set of challenges – ice dams being a prime example. At Custom Exteriors, we believe that knowledge is power. So, by understanding what causes ice dams, recognizing their potential for damage, and arming yourself with proven preventative strategies, you’re setting the stage for a damage-free winter.  Remember that our homes require care and preparation to weather the colder months. 

    If you ever find yourself unsure or overwhelmed, don’t hesitate to seek professional advice. In the age of information, resources are generally just a click away. Many exterior companies provide regular maintenance plans to assist with the tasks required to keep a healthy roof system. So, stay informed, stay prepared, and enjoy a peaceful home this winter. As always, if you have questions, we’re here to help you make the most of every season. Safe and sound.

  • Why Get A Roof Inspection This Fall?

    Why Get A Roof Inspection This Fall?

    Three important reasons to get a roof inspection this fall

    As the leaves start to change and a crisp chill fills the air, it’s that time of year again – fall. While many of us relish the season for pumpkin spice lattes and cozy sweaters, homeowners should also remember that fall is the time for exterior maintenance tasks before our harsh winter months arrive. This makes it the perfect time for one of your bi-annual roof inspections. Yes, you read that right! A roof inspection should be conducted bi-annually! In the spring and fall, on the shoulder of the severe weather months here in Colorado. 

    A roof inspection this fall can save you from costly headaches down the road when your roof experiences heavy melting snow this winter. By identifying those problems early, you may be able to prevent issues such as mold, rot, and even structural damage. In this article, we’ll delve into three important reasons why fall roof inspections should be at the top of your home maintenance checklist. 

    Why proactive roof maintenance matters

    Bi-annual roof inspections can identify issues

    Your roof is your home’s first line of defense against the elements, and it plays an important role in maintaining your home’s structural integrity and comfort. So, neglecting your roof can lead to costly repairs down the line. With this in mind, taking a proactive approach to your home maintenance is key. Here’s why proactive maintenance matters:

    What does proactive roof maintenance involve?

    Now that we’ve established the importance of proactive maintenance let’s take a closer look at what this process involves:

    As part of your regular maintenance, you should schedule bi-annual roof inspections. We recommend these inspections be performed in the spring and the fall. Because Colorado experiences the harshest weather in the summer and winter, spring and fall roof inspections can catch any issues before they worsen. During this inspection, a qualified roofing professional will examine your roof for signs of damage, such as missing or damaged shingles, loose flashing, and clogged gutters. 

    If the inspection shows any problems, addressing them promptly is important. This is because timely repairs can prevent minor issues from becoming major headaches. This often saves you money in the long run. This includes trimming any overhanging tree branches. They can scratch and damage your roof. Because of this, during this inspection, they should be cut back to prevent damage and minimize the risk of falling branches during a storm. 

    Another critical part of a roof inspection isn’t part of the roof system; it’s your gutters. It’s important to inspect and clean your gutters regularly to ensure they are free from debris. Clogged gutters can lead to water backup and damage your roof and home’s foundation. While the inspection covers other systems of your home, a roof inspection should include checking the attic for any issues. Your attic plays a significant role in your roof’s health. So, ensure it is adequately insulated and ventilated to prevent moisture buildup. If left unchecked, it can lead to roof damage and mold growth. 

    Findings of granule loss in gutters during bi-annual roof inspection

    The benefits of proactive roof maintenance

    Taking good care of your roof goes a long way, and it’s not just about fixing leaks. As a homeowner, your home protects everything that matters. With that in mind, let’s dive into why proactive roof maintenance is crucial. 

    First and foremost, there’s a financial aspect. When you proactively maintain your roof, you safeguard your hard-earned money. So, by identifying and addressing problems early on, you can avoid the significant expenses of major roof repairs. In the worst-case scenario, roof damage can result in the need for a complete roof replacement. Keeping this in mind, regular roof maintenance is a smart financial move that keeps your budget intact. 

    Next, let’s consider the value of your peace of mind. Your home is your sanctuary. A well-maintained roof ensures that it remains a secure and comfortable space. You want your home to withstand anything Mother Nature brings your way. Rain, snow, wind, hail – your roof acts as a shield during unpredictable weather conditions. So, knowing you’ve done your part to ensure this protection is reassuring. 

    Infographic explaining the benefits of regular roof maintenance

    roof maintenance: Protecting your investment

    Maintaining your roof proactively also aligns with cost-effectiveness. A properly cared-for roof supports optimal insulation and ventilation. This leads to reduced energy consumption. So, this eco-friendly approach lowers your utility bills and minimizes your environmental footprint, contributing to a greener world. 

    Furthermore, a well-maintained roof can significantly enhance your home’s resale value. So, when you decide to sell your property, a roof in excellent condition becomes a valuable selling point. It also signals to potential buyers that the home has been well-preserved. This could lead to a higher selling price and smoother transaction. 

    In summary, proactive roof maintenance is vital to your home’s longevity, financial well-being, and peace of mind. Don’t wait for problems to arise; take action now to ensure your roof can endure our severe weather months. 

    Prepare your roof for winter weather: why winter roof Preparation matters

    What is the significance of getting your roof ready for the winter season? Well, winter, especially here in Colorado, can be quite demanding. It can come with heavy snowfall, icy conditions, and fluctuating temperatures. Your roof faces the brunt of these elements, making winter preparation essential. Here’s why: 

    1. Snow Load Management:

    Colorado is known for its substantial snowfall, and the weight of accumulated snow can exert significant pressure on your roof. So, if your roof is not in great condition, it could struggle to handle this load. A professional inspector will assess your roof’s structural integrity during a fall roof inspection. This should include the condition of the shingles and support structures to ensure they can withstand possible heavy snow. 

    2. Ice dam prevention:

    Ice dams can wreak havoc on your roof. They form when warmth from your home melts snow on the roof, which then refreezes at the eaves, creating ice buildup. This can damage your shingles, gutters, and potentially lead to interior leaks. So, a comprehensive roof inspection includes an evaluation of your insulation and ventilation to prevent ice dam formation. 

    3. Gutter Maintenance:

    Clogged gutters obstruct proper water drainage, leading to water backup and potential freezing. This can result in roof damage and even compromise your home’s foundation. So, an extensive roof inspection involves inspecting and cleaning gutters to prevent these issues. 

    4. Shingle Health:

    Shingles serve as your roof’s primary defense against the elements. With its temperature fluctuations, Colorado’s weather can cause asphalt shingles to expand and contract. This can lead to damage, such as cracks, curling, or missing shingles. So, during a roof inspection, a roofing professional will identify and address any shingle issues to prevent potential leaks. 

    5. Flashings and Seals:

    Flashing protects vulnerable areas of your roof, and sealing around vents and chimneys can deteriorate over time. This deterioration can result in water infiltration and leaks. Roof inspectors will thoroughly examine these areas and make necessary repairs to maintain the integrity of your roof. 

    6. Attic Ventilation:

    Adequate attic ventilation is essential to maintaining a consistent temperature on your roof. It helps prevent ice dam formation, moisture buildup, and premature aging of roofing materials. So, your roofing inspector will ensure that your attic ventilation functions effectively. 

    Winter roof preparation goes beyond just staying warm and dry. It’s actually about safeguarding your home and investment. A fall roof inspection is your proactive measure to ensure that your roof can endure the challenges of Colorado’s winter. 

    Enhancing energy efficiency and sustainability

    When it comes to your home, energy efficiency and sustainability are more than just buzzwords; they’re smart choices that impact your comfort and the environment. Let’s start with the perks you’ll notice in your wallet. A well-maintained roof plays a pivotal role in maintaining your home’s temperature. This means less heat escaping in the winter and less heat infiltrating in the summer. When your home maintains a consistent temperature, your heating and cooling systems don’t have to work as hard. The result? Lower energy bills, which is music to any homeowner’s ears. 

    Energy-efficient homes also consume less energy, which translates to fewer greenhouse gas emissions. So, when your roof is in good shape, your home requires less energy to keep you comfortable. This reduces your carbon footprint and contributes to a greener, more sustainable future for all of us. 

    Long-term savings in a comfortable living space

    Sustainability isn’t just about the here and now. It’s also an investment in the future. So, when you optimize your roof’s energy efficiency, you’re also extending the life of your roofing materials. This means fewer replacements, less waste, and more money saved over time. It’s a win-win for your wallet and the planet. 

    Now imagine a home that stays cozy in the winter and refreshingly cool in the summer. Proper roof insulation and ventilation, part of proactive maintenance, make this a reality. You’ll enjoy a comfortable living environment year-round and save money simultaneously. 

    Enhancing energy efficiency and sustainability through proactive roof maintenance isn’t just about saving money or being eco-conscious; it’s about creating a more comfortable, responsible, and cost-effective living environment. So, when you schedule that fall roof inspection, remember you aren’t just caring for your roof. You’re actually taking a step towards a more sustainable future. Your home will be more efficient, your bills will be lower, and you’ll contribute to a healthier planet. It’s a small change that leads to significant rewards. 

  • Identifying Roof Damage

    Identifying Roof Damage

    Hail damage to a roof in Northern Colorado located by Custom Exteriors during a roof inspection

    how to identify roof damage on Your Roof: A Colorado Homeowner’s Guide

    Hailstorms are a fact of life in Colorado. From late spring through early fall, homeowners across the Front Range brace for the familiar rattle of ice against windows and roofs. These storms can move through quickly, but the damage hailstorms leave behind can last for years if not addressed. The challenge is that hail damage isn’t always obvious, and many homeowners don’t realize there’s a problem until leaks, mold, or insulation issues appear.

    Identifying hail damage early can save you thousands of dollars in long-term repair costs and prevent insurance claim complications down the road. Even minor bruising or granule loss can reduce your roof’s ability to protect your home from Colorado’s intense UV rays, temperature swings, and heavy snowfall.

    At Custom Exteriors, we’ve spent decades helping Colorado homeowners navigate the aftermath of severe weather. As a locally owned and operated roofer based in Greeley, we understand the unique roofing challenges that come with our state’s high-altitude climate and frequent hailstorms. Our goal is to help you recognize the signs of roof damage early, so you can protect your home, your investment, and your peace of mind.

    Hail damage to asphalt shingle discovered during a roof inspection by Custom Exteriors

    Why Hail Damage Is So Common in Colorado

    Colorado is one of the most hail-prone states in the country, often ranking among the top three each year for hail-related insurance claims. Homeowners across the Front Range, from Fort Collins to Colorado Springs, experience regular severe weather during the spring and summer months. Hailstones here can range in size from small pellets to golf balls or larger, and even a short storm can leave a lasting impact on your roof.

    Our state’s geography plays a big part in this. The combination of high elevation, dry air, and rapid temperature changes creates perfect conditions for hail formation. Cold air from the mountains mixes with warm, moist air from the plains, causing strong updrafts that allow hailstones to grow larger before falling. Because of this, hailstorms often hit communities along the I-25 corridor with little warning and intense force.

    In Colorado, these storms don’t just affect one type of property or roof style. Asphalt shingles can lose granules or crack, metal roofs can dent, and flat or commercial roofs can suffer punctures or membrane damage. Over time, even small areas of impact can compromise waterproofing layers and shorten a roof’s lifespan.

    For homeowners, this means regular roof inspections aren’t optional; they’re essential. After major hail events, having a professional inspection from a local roofing contractor who understands Colorado’s codes and climate can make all the difference. Custom Exteriors has seen firsthand how early detection and proper documentation can prevent costly repairs and insurance challenges later.

    Signs of Hail Damage You Can Spot from the Ground

    After a Colorado hailstorm, your first instinct may be to check your roof, but climbing up there isn’t necessary or safe. The good news is that you can often spot early signs of hail damage from the ground with a careful inspection. These indicators can help you determine whether it’s time to call a professional roofing contractor for a closer look.

    Roof-Level Clues (Visible from the Yard)

    Start by stepping back far enough to see your roof clearly. Look for missing or dislodged shingles, dark spots, or areas where shingles appear shiny; these can indicate granule loss from hail impacts. If you have a metal roof, check for minor dents or uneven reflections where hail may have struck. You might also notice bent flashing or dents along the ridge cap or roof edges, which often take the brunt of hail impact.

    Roof-Level Clues (Visible from the Yard)

    Sometimes, the best evidence of hail damage is found away from the roof itself. Walk around your property and look for:

    1. Dented gutters and downspouts: Round indentations are a clear sign of hail impact.
    2. Torn window screens or chipped paint: Hail can shred mesh or chip siding.
    3. Dings on metal surfaces: Check your air conditioner fins, mailbox, and even light fixtures.
    4. Deck or fence damage: Hail can splinter wood or strip away protective stain.

    Pro Tip for Colorado Homeowners

    After a storm, take clear, date-stamped photos of any visible damage. This documentation can be extremely helpful if you later file an insurance claim. Then, contact a local roofing company familiar with Colorado’s hail patterns and insurance process — like Custom Exteriors — to perform a detailed inspection and provide a professional assessment.

    What Hail Damage Looks Like Up Close

    While some hail damage is visible from the ground, most of it requires a closer inspection to confirm. Every roofing material reacts differently to hail, and the size, speed, and density of the hailstones all affect the type of damage your roof may have sustained. Understanding what to look for helps homeowners know what their contractor is identifying during an inspection, and why repairs or even roof replacement may be recommended.

    Asphalt Shingles

    Asphalt shingles are the most common roofing material in Colorado and also the most frequently affected by hail. Damage can appear as dark, circular spots where granules have been knocked off. These spots can expose the asphalt layer underneath, leaving the roof more vulnerable to UV rays and water intrusion. You may also notice soft, bruised areas that feel spongy to the touch, a sign that the shingle mat has been compromised.

    Metal Roofing

    During a roof inspection in Northern Colorado Custom Exteriors documented dents and pooling water on this metal roof.

    Metal roofs are extremely durable, but they aren’t immune to hail. Instead of cracks or granule loss, you’ll often see small, visible dents or surface dimples. While this may seem cosmetic, hail can damage protective coatings that prevent rust and corrosion. Over time, that can shorten the roof’s lifespan or void the manufacturer’s warranty if left unaddressed.

    Flat or Low-slope Roofing

    During an inspection on this commercial roof in Loveland, Custom Exteriors documented pooling water along the seams of the membrane.

    On flat or low-slope roofs, like those found on many multi-family buildings and commercial roofs in Colorado, hail can cause punctures, blisters, or membrane tears. After a severe storm, these roofs may also develop ponding water, worsening existing damage and accelerating deterioration. These roofing systems often require specialized coatings or repairs to restore waterproofing integrity.

    Siding, Trim, and Exterior Surfaces

    During an inspection in Greeley, our team documented this damage to the siding from hail.

    Hail rarely stops at the roof. Check your siding, fascia, and trim for cracks, chips, or punctures, especially on the sides of your home that face the direction the storm came from. In Colorado’s strong winds, hail can hit horizontally, damaging more than just the top of your roof.

    When in doubt, it’s best to have a professional inspection performed by a local roofing contractor who understands how different roofing systems respond to hail. At Custom Exteriors, our trained inspectors can evaluate each material type and provide a detailed report outlining the condition of your roof and the best next steps for repair or replacement.

    Common Misconceptions About Hail Damage

    Many homeowners are surprised to learn that hail damage isn’t always obvious, or that some visible marks may not actually be hail-related. Understanding the difference between real impact damage and normal wear can save you time, stress, and unnecessary expenses.

    “If I Don’t See Leaks, My Roof Is Fine.”

    One of the biggest misconceptions about hail damage is that it only matters if your roof is leaking. In reality, hail can bruise, crack, or dislodge shingle granules without immediately causing a visible leak. Over time, these weak points expose your roof to moisture, UV rays, and temperature extremes, all of which can shorten its lifespan. By the time a leak appears, the damage is often far more extensive and costly to repair.

    “All Roof Damage Looks the Same.”

    Not all roof damage comes from hail. Every day wear, age, falling debris, and even foot traffic can cause discoloration or marks that look similar. A trained roofing professional knows how to distinguish between hail impact and unrelated wear by checking for consistent strike patterns, shingle mat bruising, and other key indicators.

    “Minor Hail Damage Isn’t Worth Addressing.”

    Even small hail can create damage that affects your roof’s long-term performance. Granule loss, dents in flashing, or minor cracks may seem harmless now, but can lead to water intrusion and insulation issues down the road. Addressing damage early, even if it appears minor, protects your roof and preserves your insurance coverage.

    “Any Contractor Can Identify Hail Damage.”

    While many contractors offer inspections, not all are experienced in hail-specific assessments. In Colorado, where hail damage claims are common, it’s essential to work with a licensed, insured, and locally experienced roofing company. An experienced team, like Custom Exteriors, knows what insurance adjusters look for and how to document damage for a smooth claims process.

    “My Roof Survived Last Year’s Storm, So It’s Still Fine.”

    Each hailstorm is different, and roofs that withstood one event may not handle the next. Repeated impacts over time can compound damage, even if it wasn’t significant initially. Regular inspections after severe weather ensure that your roof continues to perform as it should and that small issues don’t become expensive problems.

    Why You Should Schedule a Professional Hail Damage Inspection

    After a hailstorm, it’s tempting to do a quick visual check and assume your roof is fine if nothing looks obviously damaged. Unfortunately, much of the most serious hail damage isn’t visible from the ground, and the longer it goes unnoticed, the more it can cost to repair later. That’s why scheduling a professional hail damage inspection is one of the smartest steps a Colorado homeowner can take after severe weather.

    A professional inspection goes far beyond what you can see with the naked eye. Experienced roofing specialists are trained to identify bruised shingles, lifted flashing, and punctured underlayment, all signs that hail has compromised the roof’s integrity. Using specialized tools and inspection techniques, they can detect impact points that weaken waterproofing, even if the shingles look fine from below.

    In Colorado, local expertise matters. A licensed and insured roofing contractor understands how hail patterns differ across the Front Range and how local building codes affect repair requirements. For example, roofing in cities like Greeley, Loveland, and Boulder may require knowledge of the unique code updates that govern how roofs must be restored after storm damage in those jurisdictions. Working with a company familiar with these local regulations helps ensure your roof meets all requirements and passes inspection the first time.

    At Custom Exteriors, we’ve performed thousands of hail inspections across Northern and Central Colorado. We use clear documentation, including photos and detailed reports, so you know exactly what condition your roof is in and whether any repairs are needed. This information is essential if you decide to file an insurance claim, as it provides solid evidence of storm-related damage.

    Our goal is simple: to help homeowners protect their property and avoid unnecessary stress. Whether you’re dealing with recent hail damage or want peace of mind before the next storm season, our team makes the inspection process straightforward, professional, and pressure-free.

    What Happens After Damage Is Found

    If your inspection reveals hail damage, it’s important to take the next steps carefully and in the right order. How you move forward can make a big difference in the outcome of your insurance claim and the quality of your roof replacement.

    Step 1: Document Everything

    Start by gathering all the evidence of the storm and its impact. Your roofing contractor should provide photos, inspection notes, and a detailed report outlining the type and extent of the damage. Keep copies of everything; these documents will help you if there are any questions during the claims process. It’s also a good idea to note the date and time of the storm, especially if you experienced hail in your neighborhood that caused visible damage to vehicles or landscaping.

    Step 2: Contact Your Insurance Provider

    Once you have documentation, you can contact your insurance company to begin the claim process. Most providers will assign an adjuster to inspect your property. Having your roofing contractor present during that inspection can be a major advantage. A professional roofer knows the terminology, can point out subtle damage, and ensures that nothing is overlooked when your claim is being evaluated.

    Step 3: Review the Estimate Carefully

    When you receive your insurance estimate, review it line by line with your contractor. Look for clear descriptions of work, including materials, quantities, and replacement details. Avoid “total-only” estimates that don’t show a breakdown of labor, disposal, and code-required upgrades. This is also the time to clarify coverage limits. For example, if your policy is ACV (Actual Cash Value), it may pay less than an RCV (Replacement Cost Value) policy. Your contractor can help you understand what’s covered and what might require out-of-pocket payment.

    Step 4: Schedule Your Roof Replacement

    Once your claim is approved, it’s time to schedule the work. Choose a local, licensed, and insured roofing contractor who has experience with insurance restoration and understands Colorado’s weather and building codes. They should provide a written contract, clear start date, warranty details, and a cleanup plan. At Custom Exteriors, we handle everything from material selection to post-install inspection to make sure your roof is installed correctly and your property is spotless when we’re done. We make the process even easier by being a full-service exterior contractor

    Step 5: Plan for Future Protection

    After your new roof is installed, take a few preventive steps for the future. Consider impact-resistant shingles, especially Class 4 roof products designed for Colorado’s hail-prone climate. Keep records of your new roof, including invoices, warranties, and photos, as these will help with future claims and resale value.

    At Custom Exteriors, we believe transparency, documentation, and communication are key to a stress-free storm recovery process. From the first inspection to the final cleanup, our goal is to ensure you know what to expect, understand all costs, and feel confident that your home is protected for years to come.

    Protecting Your Roof Before the Next Hailstorm

    In Colorado, hail isn’t a matter of if; it’s a matter of when. While you can’t stop severe weather, you can take smart steps to minimize damage and protect your home before the next storm hits. Regular maintenance, quality materials, and a trusted local roofing partner are the keys to long-term peace of mind.

    1. Choose Impact-Resistant Roofing Materials

    If you’re replacing your roof, ask your contractor about Class 4 impact-resistant shingles or other durable roofing systems. These products are specifically designed to withstand the force of hailstones and can significantly reduce the likelihood of damage. Many Colorado homeowners also qualify for insurance discounts when upgrading to these materials.

    2. Keep Your Roof and Gutters Clear

    Clogged gutters and downspouts can cause water to back up under shingles during heavy rain and hailstorms. Schedule regular gutter cleanings and trim nearby branches that could break during strong winds. Maintaining proper drainage helps your roof shed water and hail efficiently.

    3. Schedule Annual Roof Inspections

    An annual inspection by a local roofing contractor ensures that small issues, such as lifted shingles, worn sealant, or flashing gaps, are caught before a major storm. Proactive inspections not only protect your roof but also help establish a maintenance record, which can be valuable for insurance purposes.

    4. Check Your Insurance Coverage

    Review your homeowner’s insurance policy each year and make sure you understand what’s covered. Know whether you have RCV (Replacement Cost Value) or ACV (Actual Cash Value) coverage and whether code upgrades are included. Clear coverage now can save you unexpected costs later.

    5. Partner with a Trusted Colorado Roofing Company

    When the next hailstorm strikes, having a roofing company you already trust makes all the difference. A reputable contractor will respond quickly, assess the damage accurately, and guide you through the insurance estimate without pressure or confusion.

    If you suspect hail damage or want to make sure your roof is ready for the next storm season, contact Custom Exteriors today for a free inspection. We’ll provide honest answers, expert recommendations, and reliable protection for your home, long before the next round of hail hits.

  • Ladder Safety In Exterior Maintenance

    Ladder Safety In Exterior Maintenance

    Ladder safety infographic made by Custom Exteriors

    Ladder Safety In Exterior Maintenance

    We understand that exterior home maintenance tasks can sometimes take you to greater heights – quite literally. Whether you’re tackling roof repairs, cleaning gutters, or painting that hard-to-reach trim, using a ladder is often a necessary part of the process. However, as much as we prioritize the beauty and value of your home, we prioritize your safety even more.

    In this article, we’ll be your guides through the vital aspects of ladder safety in exterior home maintenance. From selecting the perfect ladder for the job to ensuring you’re equipped with the knowledge to inspect, place, and use it correctly, we’ve got you covered. We’ll take you step by step through the essentials, including optional safety equipment and the importance of being aware of your surroundings.

    What we will cover: 

    At Custom Exteriors, we believe that a beautiful home starts with a safe home. Let’s discuss the ins and outs of ladder safety to make sure you’re equipped with the knowledge and confidence to tackle your exterior home maintenance tasks with peace of mind. 

    Selecting the Appropriate Ladder for Maintenance at heights: Making Safety a Priority

    The importance of ladder selection cannot be overstated when tackling tasks that require the use of a ladder, like accessing your roof for inspection or cleaning your gutters. The right ladder improves your efficiency and keeps you safe throughout the process. So, how exactly do you choose the right ladder for roof access and gutter cleaning?

    Ladders come in various types, each designed for specific purposes. An extension ladder is a go-to choice for roof access and gutter cleaning due to its versatile design and adjustability. Extension ladders are designed to extend and retract, allowing you to reach different heights easily. Extension ladders are duty-rated from light duty to extra heavy duty. They are generally built with either two or three sections that are able to extend and increase the length of the ladder. These sections are called “Fly Sections.”

    Factors to consider when choosing an extension ladder for roof maintenance

    Factors to Consider When Choosing an Extension Ladder

    Height and weight matters

    One crucial factor is selecting an extension ladder of the appropriate height. The ladder should be tall enough to comfortably reach the roof or gutter area without requiring you to overextend yourself. Overreaching on a ladder can lead to instability and an increased risk of falling. The ladder should extend past the roof approximately three feet rather than right at the roof line

    It’s important to make sure the ladder you choose can support your body weight and any additional weight from the tools and equipment you’ll be carrying. Extension ladders typically come with a working load capacity rating. Select a ladder that exceeds your combined weight and the weight of your tools. Remember that roof and gutter maintenance can require heavy tools and high-pressure water when choosing the ladder for your home. 


    Material Choices

    Extension ladders are commonly available in aluminum and fiberglass. Aluminum ladders are lightweight and rust-resistant, while fiberglass ladders are non-conductive but generally heavier. Choose the material that best suits your needs and environment. When choosing which material best suits you, consider your personal strength limitations, surrounding hazards (like electrical lines), and the ladder’s intended use. 

    A ladder with sturdy construction and solid locks helps protect you while working at heights. Features like swivel feet and rubberized bases provide better stability on different surfaces.


    safety and storage

    Look for extension ladders with safety features like rung locks, non-slip rungs, and stabilizing mechanisms. These features enhance stability and prevent accidents.

    Lastly, consider the portability and storage requirements of the ladder. Extension ladders can be long when fully extended, so ensure adequate storage space. There are models available that compress for storage and transportation, but extended height may be smaller, which may not work for some homeowners. 

    Selecting the appropriate ladder is the foundation for successful and safe roof access and gutter cleaning. A ladder that is appropriately sized, capable of supporting your weight and equipment, and equipped with necessary safety features will significantly reduce the risks associated with working at heights. Remember, choosing the right ladder is an investment in your safety and peace of mind. Prioritize safety and ensure that each time you use the ladder, you can apply some simple steps to help increase your safety level while working at heights. .


    Inspecting an extension Ladder

    Before you start any exterior home maintenance project, establishing a rock-solid ladder safety foundation is crucial. This step involves two critical aspects: performing a thorough ladder inspection and mastering the art of securely placing your extension ladder.

    Before climbing a ladder, always check the following: 

    Inspections lead to safe repairs


    When it comes to ladder inspection, start by checking the ladder’s structural integrity. Examine its rails, rungs, and joints for any signs of rust, cracks, or damage. Ensuring that the rung locks and spreaders are functioning correctly is important because these components contribute to the ladder’s stability while in use. Don’t overlook the stabilizers and feet – they play a significant role in preventing slippage and wobbling.

    At Custom Exteriors, we emphasize the significance of these ladder safety steps. Our goal is to empower you with the knowledge to approach your exterior home maintenance tasks confidently, knowing that you’ve laid the groundwork for a safe and successful experience. 

    How to inspect a ladder for safety

    Mastering the Art of Placing an Extension Ladder Securely

    Infographic made by Custom Exteriors to explain the basics of setting up an extension ladder

    At Custom Exteriors, we are passionate about upgrading your exteriors and beautifying your exteriors – we’re equally passionate about your safety. Placing a ladder might seem like a straightforward task, but it’s a critical step that sets the tone for a secure and successful exterior home improvement project

    Placing a ladder properly goes beyond simply propping it against a surface. It involves strategic decisions that directly impact your safety while working at heights. Here’s why it matters:

    Safety steps to safely place an extension ladder

    Climbing with Confidence: Safe Climbing Techniques for Extension Ladders

    How to safely climb an extension ladder

    When it comes to exterior home maintenance, mastering the art of climbing an extension ladder is essential. At Custom Exteriors, we’re dedicated to enhancing your home’s appearance and ensuring your safety throughout the process. Let’s explore the proper techniques for climbing an extension ladder safely. 

    In the previous steps, we learned how to properly place your extension ladder, avoid obstacles, and the best ways to start with a stable foundation. As you can see in the photo above, when setting your ladder, ensure it extends past the roof level by several rungs to ensure safety by being able to exit the ladder onto the roof. 

    As you begin climbing, always maintain three points of contact with the ladder – two hands and one foot or two feet and one hand. This balanced approach minimizes the risk of tipping. Keep your face on the ladder at all times. Avoid the temptation to twist or turn your body, as it can lead to instability. Remember to ascend or descend one rung at a time, using deliberate and controlled movements. Rushing can compromise your balance and safety.

    As you climb, position your hips between the ladder’s side rails as you climb. This technique helps maintain your center of gravity and enhances stability. Lastly, always keep your body within the ladder’s side rails. Overreaching can cause the ladder to become unbalanced, leading to accidents.

    Optional Safety Equipment: increasing the safety of your project

    At Custom Exteriors, safety is our top priority, which extends to every aspect of your home improvement journey. By following these safe climbing techniques and considering optional safety equipment, you’re equipping yourself with the tools to tackle exterior tasks confidently. Some optional safety equipment you may consider to enhance your safety while maintaining your home include

    Ladder stabilizers provide a broader support base at the top of the ladder, reducing swaying and wobbling. Ladder stabilizers are especially useful when working near corners or edges. 

    Standoff arms create a gap between the ladder and the wall, preventing damage to the surface and offering better stability, especially on uneven surfaces. 

    Ladder mitts, or cushioned pads, provide extra grip between the ladder and the surface it rests against. They help prevent scratches and improve traction. 

    Consider using a safety harness and fall protection equipment for tasks requiring prolonged ladder use. Each homeowner should assess their physical limitations, decide if they can do this maintenance, and follow all appropriate safety measures. 

    Surroundings Awareness: Ladder Safety in Exterior Maintenance

    When it comes to exterior home maintenance, the safety of your surroundings is as critical as your ladder skills. Let’s explore why being aware of your surroundings while working with a ladder is essential to safety.

    Whether you’re cleaning gutters, repainting, or conducting roof repairs, being vigilant about your surroundings is a non-negotiable aspect of safety. We hope this guide has helped make your exterior home maintenance safer. Our goal is to ensure that you’re equipped with the knowledge and tools to create a secure and transformative home improvement journey. Stay tuned as Custom Exteriors provides more expert insights and we continue to explore ways to improve your safety and make your projects both rewarding and risk-free.

  • Are Home Maintenance Plans A Good Investment?

    Are Home Maintenance Plans A Good Investment?

    Exterior roof maintenance by Custom Exteriors

    Are Home Maintenance Plans Worth The Cost?

    Every homeowner knows that there are times when homeownership isn’t all it’s cracked up to be. In addition to all the great things about owning your home, homeownership also comes with some hassles. Would you rather watch your favorite football team on a Sunday afternoon or clean your gutters? I suppose it depends on who your local football team is, but regardless, the tasks needed to keep you home in good, working condition aren’t typically the most fun.

    Maintaining the exterior components of your home, such as the roof, siding, gutters, and windows, is important for preserving your property’s value and protecting it from weather-related damage. Home maintenance plans can offer a structured approach to keeping these vital parts of your home in good condition. Life is busy, and it is easy to overlook or neglect essential maintenance tasks. 

    These plans typically provide regular inspections, minor repairs, and preventive maintenance services, helping to identify and address issues before they develop into costly problems. Some homeowners can extend the life of their exterior features and avoid unexpected repair expenses. This proactive approach not only improves the condition of your home but also provides peace of mind, knowing that your property is well-cared for year-round. This brings to mind a few critical questions. Would having a maintenance plan in place for my home be worth it? Does it make sense for me to do my own maintenance? How hard is exterior maintenance? How do I prepare my home for winter weather? What should be included in an exterior home maintenance plan?

    We will answer all of these questions and more. So, let’s take a thorough look at what it takes to maintain your home’s exterior. With this knowledge, you can confidently make an informed decision about whether or not you need an exterior maintenance plan.

    In anticipation of that, let’s take a moment to remember that the most important part of exterior maintenance is safety. Many tasks involved in exterior maintenance are at heights, on a ladder, and involve complicated systems. Before attempting any exterior maintenance, ensure you can use a ladder safely, are comfortable at heights, and understand the requirements to keep the systems being inspected in working condition. Your safety is our top priority. If you have doubts about your ability to safely preform any of these tasks, call a professional roofing contractor to help you protect your home and your safety! 

    What should regular exterior maintenance include?

    Depending on your location, the exterior of your home is often exposed to harsh elements, including the hot sun, snow, heavy rains, strong winds, and more. Unfortunately, mother nature can take a real toll on your home. 

    With this in mind, what should be regularly inspected and maintained on the exterior of your home? 


    Your roof plays a crucial role in protecting your home from the elements, yet it often goes unnoticed until there’s a problem. It shields your home from rain, hail, and wind, but it also takes on the wear and tear that comes with that duty. That’s why it’s important to have a detailed roof inspection twice a year to check for missing or damaged shingles, cracked caulking, and other signs of wear.

    Your windows, siding, and paint are equally important. They not only protect your home but also contribute to its curb appeal. However, constant exposure to weather can lead to dirt buildup, cracks, and damage that need to be addressed regularly.

    Lastly, don’t forget about your gutters. While it’s easy to spot issues like damaged siding or peeling paint, neglected gutters can cause serious problems like mold, wood rot, and even foundation damage. Regular maintenance of your gutters is essential to keep your home in good shape.

    So, with the components of exterior maintenance identified, let’s take a brief look at what kind of maintenance each system requires, hazards to be aware of, and if exterior maintenance is something you can do yourself! 

    What maintenance does a roof require?

    Exterior roof maintenance by Custom Exteriors

    Your roof is your first line of defense against whatever Mother Nature brings its way. Your roof makes up a large portion of the first impression of your home as well. With such an important task, let’s look at what maintenance means for your asphalt shingle roof. When conducting a roof inspection, the main points that should be assessed for damage include: 

    Does Roof Maintenance Help Save Money?

    Maintaining your roof twice a year is an important part of keeping it in good shape, especially in Colorado, where maintenance during the shoulder seasons of severe weather is mandatory. Regular maintenance helps prevent small problems, like cracked caulking or a damaged shingle, from becoming bigger issues. Even minor roof damage can lead to interior water damage, mold, or wood rot. Regular upkeep also saves homeowners money in the long run, helping to extend the roof’s lifespan and avoid the cost of replacing it every 15 to 20 years.

    The first step in roof maintenance is to perform visual inspections at least twice a year. These inspections are necessary because they help spot any signs of damage. Issues like cracked or hail-damaged shingles may only be visible during these checks. During the inspection, look for signs of curling, blistering, cracked or missing shingles, and any debris on the roof. It’s also good to inspect flashings, vents, skylights, and any siding or trim above the roofline.

    Your gutter system should also be inspected and cleaned at least twice yearly. Clearing out debris, leaves, and sticks ensures proper drainage. It’s also important to check that your gutters are sloped correctly and that downspouts direct water away from the foundation to prevent water from pooling around your home.

    While inspecting the roof, clear any organic growth or overgrown tree limbs. Remove moss, algae, or mold if you see any, and trim any trees or bushes hanging over the roof. This proactive approach helps prevent damage from falling debris during storms, giving homeowners a sense of control and preparedness.

    roof maintenance requirements

    Next up, you should complete a thorough inspection of your roof flashings. Roof flashings are the metal edgings around your chimney, vents, and skylights. It is essential to check these flashings for signs of damage or rusting. Properly sealed flashing is crucial for preventing leaks. This is also a great time to inspect the caulking around vents, pipes, and other roof penetrations. Cracked and damaged caulking is a common source of roof leaks. 

    Lastly, a quick visual inspection of the attic to look for signs of water staining, condensation, mold, or mildew. Improper attic ventilation can create serious problems with mold, mildew, and spongy roof decking and even cause your HVAC system to work hard, resulting in a shorter lifespan for your HVAC components. In the end, you should inspect every component of your roof prior to each severe weather season. 

    Why is gutter maintenance important?

    Are your gutters draining correctly, or are they causing water to pool around your home’s foundation? These are important questions to revisit regularly, as failing to do so could lead to serious damage to your home.

    Gutters play an important role in protecting your home’s foundation and exterior walls by directing rainwater away from the structure. However, when gutters become clogged with leaves, twigs, and debris, they can create major problems. Regular gutter maintenance is necessary to ensure water flows properly and to prevent clogs. By clearing out debris and checking for damage or blockages, you can keep your gutter system working efficiently and protect your home from costly water-related issues. Keeping your gutters in good condition is a smart investment in your home’s long-term health and stability.

    It’s also important to check that your gutters are properly sloped and that downspouts direct water far enough away from your foundation. These simple checks can help prevent mildew, mold growth, foundation damage, and interior leaks.

    As an exterior contractor, we often see problems caused by neglected gutters. Issues like interior water damage, mold, and even cracked concrete or structural damage can all stem from poor gutter maintenance. Regular gutter care is one of the most critical steps you can take to keep your home in top shape.

    Lack of gutter maintenance creating mold issues discovered by Custom Exteriors during a siding replacement

    Windows, Siding, And Paint

    Maintaining the windows, siding, and exterior paint of your home is crucial to preserving its beauty, structural integrity, and overall value. These exterior elements are essential for the visual appeal of your home and serve as protective barriers against the elements. Regular maintenance ensures they can perform their functions effectively, providing comfort and security for you and your family. Here’s why investing time and effort into window, siding, and paint maintenance is a wise decision:

    exterior maintenance

    One significant benefit of proper maintenance is enhancing your home’s curb appeal. A well-kept, updated exterior creates a positive first impression and increases the overall value of your property. It makes your home stand out in the neighborhood and even more appealing to potential buyers if you ever decide to sell.

    Moreover, your home’s exterior faces constant exposure to harsh weather conditions, UV rays, rain, snow, and wind. Routine maintenance helps protect windows, siding, and paint from deterioration. By catching problems quickly, you prevent water intrusion, rot, mold growth, and fading due to sun exposure. 

    Additionally, maintenance contributes to the comfort and well-being of your family. When you maintain quality windows and siding, you help prevent drafts and air leaks, creating a cozy living environment. Properly maintained paint prevents moisture from seeping into walls and ceilings, preserving indoor air quality and safeguarding against potential health hazards like mold growth.

    Taking care of your home’s exterior also ensures the longevity of materials. Let’s be honest: exterior repairs are not cheap. Regular inspections and touch-ups help extend the lifespan of windows, siding, and paint, maximizing your investment. By preserving the structural integrity of these elements, you can avoid premature replacements and save money in the long run.

    Addressing maintenance proactively ensures you can take pride in your home without constant worries about exterior damage. Regularly scheduled maintenance means knowing your home is well-protected and taken care of. That kind of peace of mind is hard to beat.

    Are Exterior Maintenance Plans Worth It?

    Exterior maintenance is undeniably mandatory for homeowners. Protecting your investment and ensuring the longevity of your property requires regular care and attention to critical components like the roof, siding, windows, gutters, and paint. But the question remains: are maintenance plans worth it for everyone?

    The answer lies in understanding your individual needs, abilities, and preferences. Here are some factors to consider when deciding whether a maintenance plan is the right choice for you:

    While exterior maintenance is essential for all homeowners, determining if a maintenance plan is worth it depends on your unique circumstances. Assessing factors like time availability, expertise, budget, approach to maintenance, and long-term investment goals can guide you in making an informed decision. Whether you choose a maintenance plan or DIY care, the ultimate goal remains the same: ensuring your home stays in optimal condition, reflecting your pride of ownership for years to come.

    Custom Exteriors offers cost-effective exterior maintenance solutions to Colorado and Wyoming residents seeking professional services for their exterior maintenance needs. You can learn more about this service by contacting Custom Exteriors

  • How to Replace Your Window Screen

    How to Replace Your Window Screen

    Learn how to replace window screens yourself

    How to replace your screens on a budget

    Have you ever been caught off guard by the price tag of something you really need? It’s a familiar feeling we can all relate to. Window screens are one such item. Who would have thought that a seemingly simple thing could put such a dent in your wallet? According to Yelp, replacing a single screen can soar to over $700. Yes, you read that right—each! 

    As an exterior contractor based in Colorado, we find our team replacing screens annually after our typical summer hail storms. The damage is often strong enough to require repairs to the window screens but does not warrant window replacement. Additionally, to reach the top end of the price range on screens, you are likely referring to custom materials or specialty installations. That being said, in our area, a screen replacement will likely exceed $100.  

    Custom Exteriors is here to rescue your savings account. Because of our extensive knowledge and experience with screen replacement, we are confident we can teach you the art of DIY screen replacement—a surprisingly simple task. We’ll guide you through the process and provide a list of essential tools. Spoiler alert: the total cost can be kept well under $50. 


    Common DIY Mistakes When Replacing Your Screens

    When replacing a window screen, it’s important to be aware of common mistakes often made. One common error is not taking the time to gather and record accurate measurements. Even an error of less than a quarter of an inch can result in a replacement screen that doesn’t fit properly. 

    That can then lead to a lack of a tight seal or a screen that is too loose. When a screen is too loose, it can allow bugs and debris to enter. If you are replacing the screen frame as well, it’s important to measure the dimensions of the window frame within an eighth of an inch. You want your new screen frame to be an exact replica of the damaged one. By doing so, you ensure a snug fit for the replacement screen.


    Materials matter

    Completing an exterior remodeling project can be stressful because there are many important choices. You have to choose the right paint color, roof materials, shingle colors and styles, and many other considerations. An often overlooked option that can drastically affect the indoor air quality of your property is the material chosen to replace your window screens. Different window screens are designed for specific purposes. While metal screens are more durable, they come with a higher price tag and can cause poor visibility or reduced airflow. Fiberglass mesh is more affordable; however, it provides a decreased level of durability. 

    To ensure the best results, choosing a screen material based on your specific needs is essential. That could include fiberglass, aluminum, or stainless steel. In Colorado, the most common material is fiberglass mesh. While we do encounter metal screens in residential settings, they are slowly being replaced by their fiberglass counterpart. This is partly due to fiberglass mesh being more manageable to work with and more affordable. 

    We still find stainless steel and bronze screens in more high-end applications. As part of a high-end exterior remodel, metal screens can make a huge impact. They are also corrosion-resistant, more durable, and can be customized. With that in mind, their thicker composition can cause reduced visibility and airflow. 

    Tension And Time

    Achieving the correct tension when installing a replacement screen is crucial. Overstretching the screen can lead to warping or tearing. On the other hand, under-stretching can result in a loose and ineffective screen. But what is the right tension? Custom Exteriors has provided comprehensive video instructions teaching you how to rescreen a window screen. Mike walks you through the replacement every step of the way. 

    If you watched the DIY video, you can see that we take our time when replacing screens. Skipping steps or rushing through the process is a common mistake. Installing a replacement screen requires patience and attention to detail. If you rush, you’re more likely to make mistakes. When mistakes are made, you may have a screen that doesn’t function properly. Take time, carefully follow the instructions, and double-check your work.

    how to replace your screen

    The “Need To Know” Parts Of Your Window Screen

    What Is This? The Anatomy Of A Screen

    Window screens might seem like a minor detail, but they play an important role in enhancing your space’s overall comfort and functionality. It impacts various aspects of comfort, aesthetics, and functionality. By understanding the parts of a window screen, you can make informed choices that align with your specific needs and goals.

    The anatomy of a window screen includes elements such as mesh material, frame, and spline. Collectively, these components contribute to better temperature regulation within your living or working spaces. 

    components of a screen

    Why You Need To Know

    By selecting the right mesh material and ensuring a proper fit, you can allow fresh air to circulate. And at the same time, you can keep out insects and dust. This reduces the reliance on air conditioning and heating systems. This then leads to potential energy savings and a more sustainable environment.

    An understanding of the anatomy of a window screen allows you to select screens that allow for optimal airflow. Proper ventilation is essential for maintaining indoor air quality and reducing stuffiness.  

    From energy efficiency to allergen reduction and enhanced visual appeal, a well-chosen window screen has the potential to transform your indoor environment for the better. Explore the options available and elevate your space with the power of well-designed window screens.

    Gathering your tools: Don’t start without the screen replacement essentials

    Starting on a DIY project is an exciting task. But it’s not uncommon to encounter the frustrating realization that you lack the necessary tools to get the job done. To avoid unnecessary hiccups and make your project run smoothly, gathering all the essential tools beforehand is crucial. 

    So whether replacing a window screen or tackling any other home improvement task, having the right tools at your disposal is important. It can save you time, effort, and frustration. Here’s a comprehensive list of the must-have tools we use on a window screen replacement project.

    Your Tools

    Tools needed for replacing your window screens

    Secure the Frame and remove the old materials

    Removing old screen materials when replacing a screen

    The first step in a rescreen is making sure the frame is stable and removing any old, damaged materials. After you determine that your screen frame is still in working condition, you can begin the process of replacing the screen mesh. In this step, we’ll guide you through securing the frame using duct tape or clamps, safely removing the old spline with a spline removal hook, and removing the damaged screen, leaving you with a clean, prepared frame for reinstallation.

    To begin, inspect the window screen frame for any looseness or instability. If you find the frame shaky or anticipate difficulties during the replacement process, consider using duct tape or clamps to secure it temporarily. Applying duct tape to the frame’s corners or using clamps along the edges will keep the frame steady and prevent any accidental shifts while you work on it.

    Securing the frame and removing the old materials are critical first steps in replacing your window screen. Using duct tape or clamps to stabilize the frame, carefully removing the old spline with a spline removal hook, and removing the damaged screen, you’re left with a clean and prepared frame ready to install the new screen mesh. Proceeding with these initial steps ensures a smooth and efficient process as you move forward with your window screen replacement project.


    Spline Time

    Next, it’s time to remove the old spline. The spline is the rubber-like cord that holds the screen mesh in place. You’ll need a spline removal hook, also known as a spline tool, to do this. Carefully insert the hook into the frame groove where the spline sits and gently lift it. Work around the entire frame, not damaging the frame or the screen mesh. If the old spline is in good condition and fits securely, you may choose to reuse it later in the process.

    Once the old spline is removed, inspect its condition. If the spline is intact, pliable, and shows no damage or wear, it can be reused during the reinstallation. However, if you notice any signs of wear, cracking, or brittleness, it’s best to opt for a new spline to ensure a tight fit for the new screen mesh. With the spline removed, it’s time to remove the old, damaged screen. Carefully pull the screen mesh away from the frame, starting from one corner and working your way around. 

    Be gentle to avoid any tears or additional damage to the frame. Dispose of the old screen appropriately, or if it’s still in decent condition, consider recycling or repurposing it if possible.

     
    Remove all of the old screen materials before starting to rescreen your screen

    Measure and cut your new screen material: Precise Preparation

    After securing the frame and removing the old materials, the next crucial step in replacing your window screen is to measure and cut the new screen mesh. A precise fit ensures a seamless and effective replacement. This section’ll guide you through measuring the screen dimensions accurately. This includes cutting the new mesh to size and preparing it to install the spline.

    Start by measuring the dimensions of your window frame accurately. Use a tape measure to determine the length and width of the frame from the outer edge to the outer edge. Measure both horizontally and vertically, as some frames may not be perfectly square. Record these measurements for reference when cutting the new screen mesh. When cutting the new screen mesh, adding a few inches of extra margin on all sides is essential beyond the actual frame dimensions. This additional margin ensures that you have enough material to fit securely within the frame and allows room for adjustments during installation.

    Measure the screen so there is excess on each side of at least an inch

    Before installing the spline, double-check that the screen mesh is appropriately aligned within the frame. The mesh should be taut but not overly stretched. Then, ensure it sits evenly along all edges of the frame. This step is crucial as it establishes a secure and visually pleasing window screen. Measuring and cutting the new screen mesh is vital in the window screen replacement process. 

    You then ensure a perfect fit by accurately measuring the frame, adding extra margin, and carefully cutting the mesh. This is essential for a functional and aesthetically pleasing window screen. With the screen mesh laid out and ready for spline installation, you’re one step closer to completing your DIY project. You’ll enjoy the benefits of a refreshed window screen in no time.

    Reinstall the spline

    After measuring, cutting, and laying out the new screen mesh, the next critical step in replacing a window screen is reinstalling the spline. This process involves securing the screen mesh firmly within the frame to ensure it stays in place and functions effectively. In this section, we’ll provide you with some useful tips to make reinstalling the spline easier and achieve professional-grade results.

    A spline roller is an indispensable tool for this step. The rounded edge of the spline roller helps you press the spline firmly into the groove of the frame, ensuring a tight fit. When using the spline roller, apply even pressure along the entire length of the spline to avoid any gaps or loose areas. This will keep the screen mesh securely in place and prevent any potential sagging over time.

    It is important to distribute the tension evenly as you work your way around the frame. Press the spline into the groove on one side and then move to the opposite side to create balanced tension. Proceed to work your way around the screen, repeating the process on each side until the spline is fully installed.

    Installing the spline to keep the mesh screen in place when replacing your window screens

    Trim Time: Remove The Excess Mesh

    After installing the spline all around the frame, you may have some excess screen mesh extending beyond the frame’s edges. Use sharp scissors or a utility knife to trim the excess carefully. Be cautious not to cut too close to the spline, as you want to ensure a secure hold without compromising the tension of the mesh. Once the spline is in place and the excess mesh is trimmed, inspect the screen for any gaps or loose spots. If you find any, use the spline roller to press the spline more securely into the groove or adjust the screen mesh slightly to achieve a snug fit.

    Reinstalling the spline is a crucial step in the window screen replacement process. By using a spline roller, starting in the middle, keeping the screen taut, and trimming excess mesh carefully, you can achieve a professional-looking result and enjoy a fully functional window screen. These tips will make the process easier and help you achieve a successful window screen replacement that enhances the comfort and functionality of your home.

    And That is all it takes to replace your screens!

    Congratulations! You’ve successfully completed all the essential steps to replace your window screens. By securing the frame, removing old materials, measuring and cutting the new screen mesh, and reinstalling the spline with precision, you’ve revitalized your window screens and improved the comfort of your home. If you prefer a visual guide, we’ve got you covered with a helpful how-to video. Additionally, we’ve provided links to purchase the required items from Amazon to make your window screen replacement project a breeze.

     Follow along with our expert instructions and tips to ensure you get the job done efficiently and effectively.

    Purchase the required items:

    If you need to stock up on the necessary tools and materials for your window screen replacement project, these are the items we use when replacing screens:

    You’ve now mastered the art of replacing window screens! By following the steps provided by Custom Exteriors, you’ve enhanced the functionality and appearance of your window screens. If you prefer a visual guide, our how-to video will be invaluable for your project. So get started, enjoy the satisfaction of a job well done and the benefits of your refreshed window screens!


    DIY Made Easy

    In conclusion, replacing your window screens is a rewarding and straightforward DIY project that can significantly improve the comfort and functionality of your home. By following the steps outlined in this guide, you can achieve professional-grade results without needing costly professional services.

    Remember, having the right tools is critical to a successful window screen replacement. Investing in essential items like duct tape, a new mesh screen, spline, scissors, a spline roller, a spline-removing pick, and a sharp utility knife will make the process smoother and more efficient.

    Additional Resourses:

    The screen replacement process
  • Roof Replacement Insurance Estimate

    Roof Replacement Insurance Estimate

    Roof replacement by Custom that was covered by an insurance claim

    Navigating Roof Replacement and Insurance Claims

    Your home has just been damaged by severe weather. In most cases, this will likely mean navigating not just a roof replacement but also an insurance claim. If you are in this situation and feeling a little overwhelmed, you are not alone. Because most Colorado residents will experience a severe weather event in their lifetime, understanding this process is important whether you’re a homeowner, a business owner, or a property manager. Unfortunately, identifying roof damage, documenting it, and navigating your insurance claim is often difficult. With decades of experience in the industry and a team of insurance specialists, we plan to simplify the insurance-backed roof replacement process. Having an understanding of this process is essential for making informed decisions.

    Roof replacement alone, an essential aspect of property maintenance, can be an intimidating task. This becomes even more of an issue when combined with the hassles of an insurance claim. Homeowners need to know their insurance policy specifics, the extent of damage, and the world of roofing materials and labor costs. Navigating this process is much less stressful with understanding insurance terminology, documentation requirements, and inspection procedures. This can easily overwhelm even the most seasoned property owner.

    Why is it important to understand this process? In short, it empowers you. Knowledge of insurance-covered roof replacements lets you communicate effectively with insurance adjusters and roofing contractors. It also allows for a better understanding of policy specifics. It also ensures you’re aware of unexpected costs and discrepancies in coverage. This makes the process smoother, and the property owner feels more confident in their decisions. So, let’s gain knowledge that empowers you to protect your property and investment with knowledge and clarity.

    How Insurance Timelines Shape Your Roof Replacement

    What is considered a “Timely Manner”?

    When it comes to protecting your property, time is of the essence. Insurance providers operate under the principle that prompt action leads to protection. Homeowners should make a practice of reporting damage within specific timelines. This will ensure your insurance coverage remains intact. It is a best practice to inspect for damage after any severe weather event. 

    Most insurance companies operate on a timeline that allows a year as the window for reporting damage from your date of loss. This timeline plays an important role in determining your coverage. If you surpass this one-year mark, the likelihood of your insurance company covering the damages declines considerably. At this point, the door to coverage starts to close. This highlights the importance of acting quickly.

    Why insurance companies care when you file your roof replacement claim

    There are several reasons why insurance companies impose this requirement, including:

    Unveiling three vital steps for significant impact

    When it comes to insurance-covered roof replacements, a lot of planning and strategic actions can make all the difference in securing complete coverage. This section discusses the three steps required for a successful insurance-covered roof replacement based on our experience. Each of these steps, though seemingly small, has the potential to impact your project’s outcome significantly.

    Step 1: Document the Damage

    Before starting any roofing project, documenting the extent of the damage is the first step. Armed with your smartphone or camera, either you or your roofing contractor should photograph the affected areas from multiple angles. Visual documentation is a powerful tool for showing the actual damage to both your insurance company and potential roofing contractors. These images are clear evidence of the state of your roof prior to repairs, strengthening your position in the claims process.

    Documenting Hail damage roof repair

    Step 2: Contact your insurance provider

    Once you’ve documented the damage, your next move is to get in touch with your insurance provider promptly. Initiate the claims process by submitting the information you’ve gathered. Provide a detailed account of the damage, accompanied by the images you’ve captured. Your proactive approach to reporting the damage can accelerate the claims process and create a smoother experience.

    Step 3: Choose a reputable roofer

    Selecting the right roofing professional can significantly impact the quality of your replacement project. Look for a reputable roofer with a track record of excellence and integrity. A skilled roofing contractor will not only provide an accurate idea of the condition of your roof, but will also provide a clear and concise estimate. They should also be able to negotiate effectively with your insurance company. Their expertise ensures that the repairs align with industry standards and codes and your insurance coverage, minimizing the potential for discrepancies.

    By following these three steps—documenting damage, contacting your insurance provider, and selecting a reputable roofer—you’re setting yourself up for a successful insurance-covered roof replacement. Remember, it’s the thoughtful attention to detail and strategic actions that pave the way for a seamlessly executed project that maximizes both your coverage and peace of mind.

    your key to Preventing future property damage

    It’s a fact that your roof and its components protect your home. When you see small problems with it, those are signals you should pay attention to. If you take action when you see these signals, you can often stop bigger issues from happening. But if you ignore these signals, even if they seem small, it can lead to more serious problems. 

    Issues that may arise when roof repairs are left unchecked

    Taking care of roof damage immediately is crucial for your home’s safety, comfort, and how long it lasts. Even minor issues can become big headaches if you don’t fix them. For instance, a tiny leak can become a huge water problem that harms your home’s structure and causes mold, which can be expensive to fix.

    The longer you wait, the more you’ll probably have to pay. Remember that your insurance company has a deadline for reporting damages if you want to get your roof repaired or replaced through your insurance. So, acting quickly saves you money and keeps things smooth with your insurance.

    Issues that may arise when roof repairs are left unchecked

    Fixing roof problems isn’t just about making things better now. It’s also about ensuring your property stays good in the long run. When you fix minor issues, you prevent more significant problems from showing up. So, even if it’s just a tiny crack or a leak, repairing it early can help your property stay strong and not have problems later.

    In the end, paying attention to roof problems is like getting a heads-up. It’s a way to ensure your property stays in good shape and has no unexpected troubles. So, let’s learn more about how to take care of our properties and keep them safe for the future.

    replacement cost value = Actual Cash Value + Depreciation

    1. actual cash value

    Actual cash value, or ACV, is a method insurance companies use to determine the value of an item damaged or lost in an insurance claim. 

    The actual cash value of an item is determined by considering its original purchase price, age, condition at the time of the loss or damage, and the current market value of similar items. Depreciation is taken into account because most items lose value over time due to wear and tear, obsolescence, or other factors. 

    It is important to note that insuring your property for its ACV only may result in a lower insurance premium, but it also means that you may receive less money in the event of a claim. With an ACV policy, you will be responsible for the difference between the determined actual cash value of your damage and the cost to restore it to pre-damage conditions. 

    2. depreciation

    Depreciation is the reduction in the value of an item over time due to factors such as wear and tear, obsolescence, and aging. It is an essential concept in insurance because it affects the amount of money you can receive from an insurance claim. 

    When an item is insured, the insurance company may consider depreciation when determining value. Depreciation can be calculated in different ways depending on the type of item being insured. 

    It’s essential to understand how depreciation works when purchasing insurance and filing a claim, as it can affect the amount of money you receive from the insurance company. If you have any questions about how depreciation is calculated, you should talk to your insurance agent or read your insurance policy carefully to understand the terms and conditions. 

    2. replacement cost value

    Replacement cost value, or RCV, is the amount of money it would take to replace an item with a new one of similar quality and functionality. It determines the maximum amount of money you can receive from an insurance claim. 

    When you purchase insurance, you may be asked to choose between insuring your property for its replacement cost or its actual cash value. If you choose to insure your property for its replacement cost, the insurance company will pay you the total cost of replacing the item with a new one, regardless of age or depreciation. 

    It’s important to note that insuring your property for its replacement cost may result in a higher insurance premium, but it also means that you can receive more money in the event of a claim. Reviewing your policy carefully is essential to understand any limits or exclusions. 

    roof replacement insurance payment timeline

    In this section, we discuss key terms that play a vital role in understanding your coverage: deductibles, Actual Cash Value (ACV) payment, and Replacement Cost Value (RCV) payment. Whether you’re a homeowner or a business owner, these terms hold the key to making informed decisions when it comes to your roof replacement project.

    Your Deductible

    Think of a deductible as your initial contribution towards a covered insurance claim. It’s the amount you agree to pay out of your own pocket before your insurance company steps in. When it comes to roof replacements, your deductible is subtracted from the total cost of the repairs or replacement. Choosing a deductible that suits your financial situation is important, as it affects your insurance premium and the amount you’ll need to cover before your insurance kicks in.

    ACV Payment

    Actual Cash Value (ACV) is how insurance companies calculate the value of what you’re claiming for. They consider factors like the original purchase price, the item’s age, its condition at damage time, and current market values. ACV takes into account depreciation. This means items lose value over time due to wear and tear or other factors. If you have an ACV policy for your roof replacement, keep in mind that you might receive less money in case of damage, as you’ll be compensated for the current value of your roof, factoring in depreciation. When you receive and ACV check, it will be for the depreciated value of your damages. If you have an RCV policy, you will later receive the final payment after repairs are completed. 

    RCV Payment

    Replacement Cost Value (RCV) payment provides a more comprehensive coverage option. With RCV, your insurance company covers the cost of replacing your damaged roof with a new one of a similar kind and quality without considering depreciation. This means you’re more likely to receive a higher payout that can better match the cost of restoring your property to its pre-damage state. While RCV insurance might come with higher premiums, it can be a reassuring choice for those seeking more complete coverage. 

    If you have an RCV policy, once all the repairs are complete, you will receive a final check. This will be for the remaining amount held back when the roof was depreciated. Once repairs are complete, you should be reimbursed for all costs except your deductible. 

    In conclusion, as you embark on your insurance-covered roof replacement journey, remember that understanding deductibles, ACV, and RCV payments is vital. By grasping these concepts, you’re equipping yourself to confidently navigate the claims process and ensure that your property’s protection aligns with your needs and financial situation. Feel empowered to make decisions safeguarding your investment while keeping you prepared for any unexpected twists.

    insurance summary for northern colorado roof replacement

    The front page of your insurance claim,
    where everything you need to know is

    The front page of your insurance policy contains critical information that you should review and keep handy in case you need to file a claim. This information includes your policy and claim numbers, when the damage was sustained, and all the necessary details for your insurance adjuster. 

    When you file a claim, your insurance company will use the information on the front page of your policy to process your claim quickly and efficiently. Your policy number and claim number are unique identifiers that help your insurance company access your policy and claim information promptly.

    In addition to your policy and claim numbers, the front page of your policy should also include the date of loss, which is the date when the damage occurred. This information is critical because it helps insurance companies understand the timeline of events leading to your claim.

    The front page of your policy should also include information about your adjuster, such as their name, contact information, and the inspection date. This helps you stay informed on your claim and lets you contact your adjuster if you have any questions or concerns. 

    In summary, the information on the front page of your insurance summary is critical in a claim. By reviewing and keeping this information handy, you can help ensure that your claim is processed quickly and efficiently and that you receive the compensation you are entitled to. 

    insurance summary for roof replacement

    The repair pages,
    where you talk numbers

    The page or pages of a roof replacement estimate that discusses the amounts and what will be replaced are typically called the scope of work or the line item estimate. This page will list all of the individual items that will be replaced or repaired during the roof replacement, along with the cost for each item. 

    The scope of work will typically include a detailed breakdown of all the materials that will be used in the replacement, such as shingles, underlayment, flashing, and other necessary components. Each material will be listed with the corresponding quantity and cost so you can see exactly what is being used and how much it will cost. 

    In addition to the materials, the scope of work will include the cost of labor and any additional services, such as debris removal and disposal. Each service will be listed with the corresponding price, showing how much labor and services will cost. 

    It’s important to review the scope of work carefully to ensure that all of the necessary repairs and replacements are included and that the costs are reasonable and in line with industry standards. If you have any questions or concerns about the scope of work, it’s always a good idea to discuss them with your contractor or insurance adjuster to ensure that fully understand the estimate and what you will be paying for. 

    roof replacement insurance summary

    where your deductible comes into the equation

    In this estimate, depreciation was not taken. However, you can see the line item for the depreciation deduction if it were to be taken. Your deductible and how it affects this process should have been noted on the repair page. 

    Every insurance policy has a deductible. Your deductible is a predetermined amount of money a property owner is responsible for if they file an insurance claim. Your insurance company covers any expense over that deductible amount.

    When payment is made on your insurance claim, it will work like this. Your initial ACV payment will be made “less the deductible.” Once the ACV is determined, payment is made in the total ACV amount minus your deductible (typically from $500 to $2500), as that is the portion of the claim you are responsible for. 

    Often, this is where the claim could be more straightforward for property owners. When they see the term “less deductible,” they think their deductible has already been accounted for. That is not correct. The deductible is part of the estimate as a whole. So, your ACV + your deductible check + depreciation check = replacement cost value. The insurance company owes everything above and beyond the deductible amount. So, the property owner pays $500 or $1000 (or whatever their deductible is), and the insurance company covers all repair costs above that amount. 

    Example 1:

    A rcv policy with a $1000 deductible

    Most homeowners have RCV policies where their insurance company will pay for the total of repairs minus their deductible. 

    Let’s say a homeowner suffered roof damage during a hail storm. They have a $1000 deductible. Their asphalt shingle roof had standard architectural shingles, which have an average lifespan of 30 years; however, they were ten years old. Upon inspection, the roof needs to be replaced, and the cost to replace the roof will be $15,000. 

    Since the roof is ten years old, approximately one-third of its useful life has passed. In this case, the roof would be depreciated by 33% or $5000. This means that the current actual cash value or ACV is $10,000. When this is paid to the property owner, they will receive the ACV payment in full less the deductible. So, when the ACV check is issued to the homeowner, it will be $9000, with the customer contributing their $1000 deductible. The ACV check + the homeowners deductible = the total ACV amount. 

    This leaves $5000 of the remaining replacement cost value or RCV remaining. Once the repairs are complete, the depreciation check will be released in the total repair amount. 

    The ACV check from the insurance company (less the homeowner’s deductible amount) + homeowners deductible + depreciation check = replacement cost value (total claim amount).

    In this example, the homeowner would have received a $9000 ACV check (the total ACV amount – the deductible) and a depreciation check for $5000. To restore this roof to pre-storm conditions, this homeowner is out-of-pocket $1000.

    Example 2:

    AN Acv policy with a $1000 deductible

    Occasionally, property owners have an ACV policy only. Sometimes, this is in an attempt to save money, but sometimes it comes from needing a clearer understanding of what an ACV policy means. 

    The same homeowner suffered roof damage during a hail storm, but they have an ACV policy this time. They have a $1000 deductible. They have a standard architectural shingle roof with an average lifespan of 30 years. However, they were ten years old. Upon inspection, the roof needs to be replaced, and the cost to replace the roof will be $15,000. 

    Since the roof is ten years old, approximately one-third of its useful life has passed. In this case, the roof would be depreciated by 33% or $5000. This means that the current actual cash value or ACV is $10,000. When this is paid to the property owner, they will receive the ACV payment in full minus the deductible. So, when the ACV check is issued to the homeowner, it will be $9000, with the customer contributing their $1000 deductible. The ACV check + the homeowners deductible = the total ACV amount. 

    This is where things start to change. It still leaves $5000 of the replacement cost value or RCV. However, because this homeowner has an ACV policy only, They will not receive any additional insurance payments. 

    In this case, the homeowner would receive a $9000 ACV check ($10,000 ACV amount – deductible), and the remaining costs would be due from the homeowner. In this case, the property owner would be out-of-pocket $6000 to restore their roof to pre-storm conditions. 

Custom Exteriors, LLC BBB Business Review